
Hey everyone, doc Miles at North American Rescue. Today we're going to talk about how to evaluate a wound or a laceration, how to assess it, how to clean it, and how to use a wound closure device to close that wound.
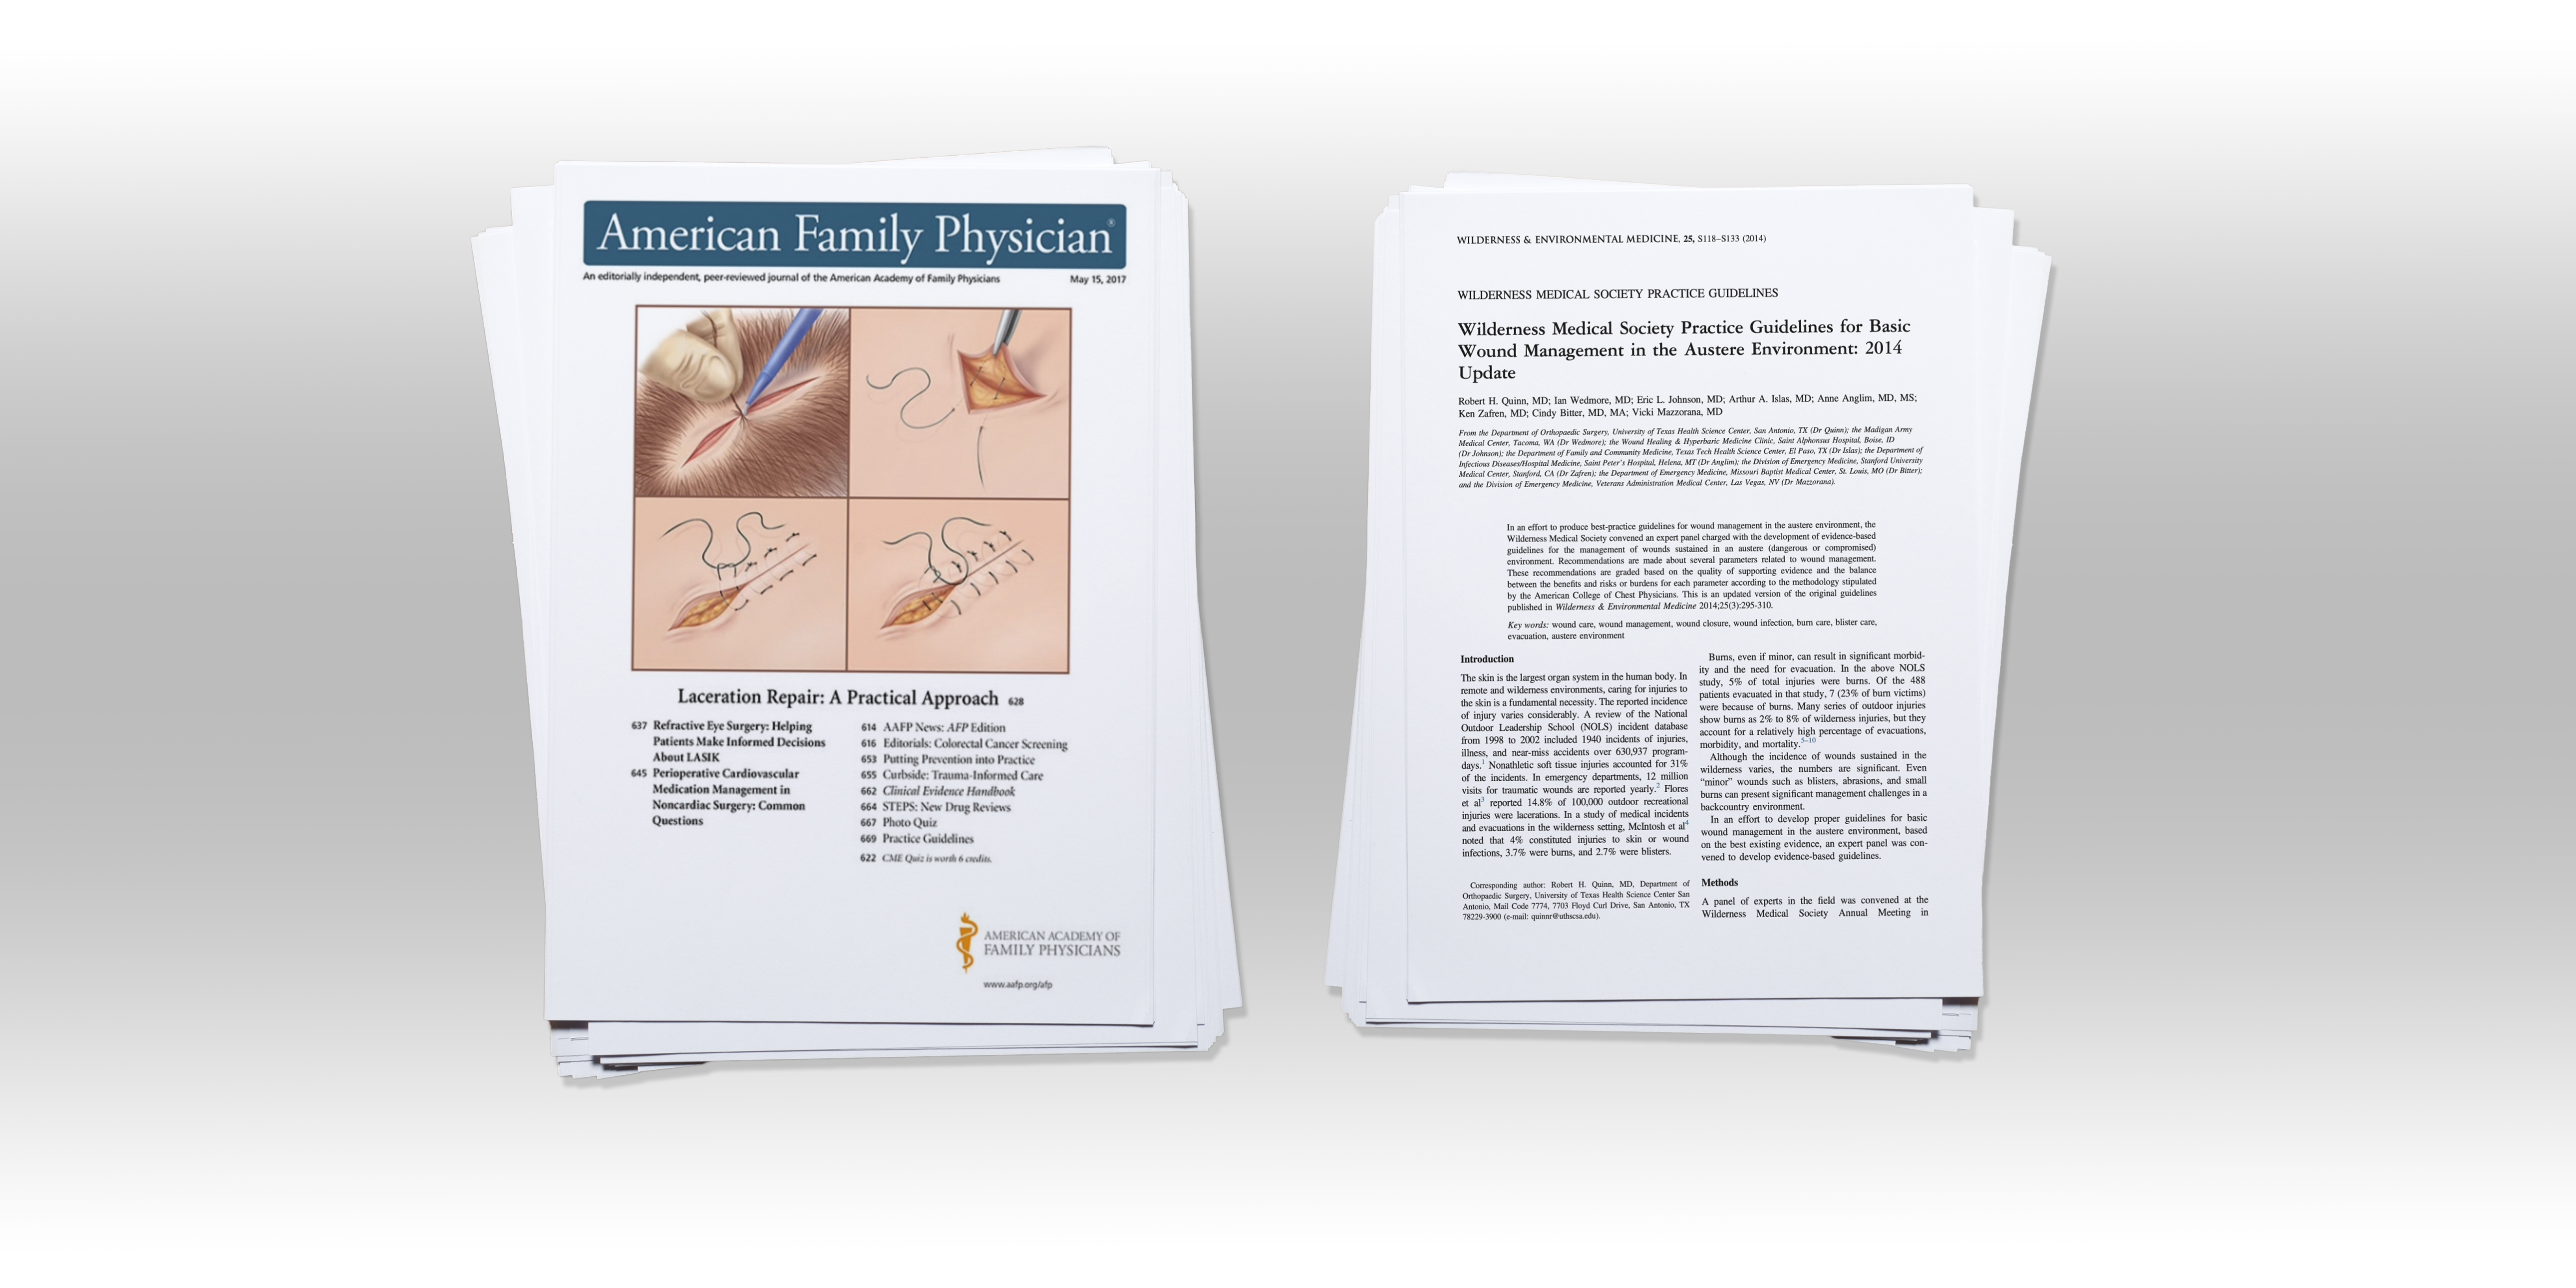
I've got two main references that we'll be going off of that we'll post below. One is from the American Academy of Family Physicians, and the other one is from the Wilderness Medical Society.
Suture Technique
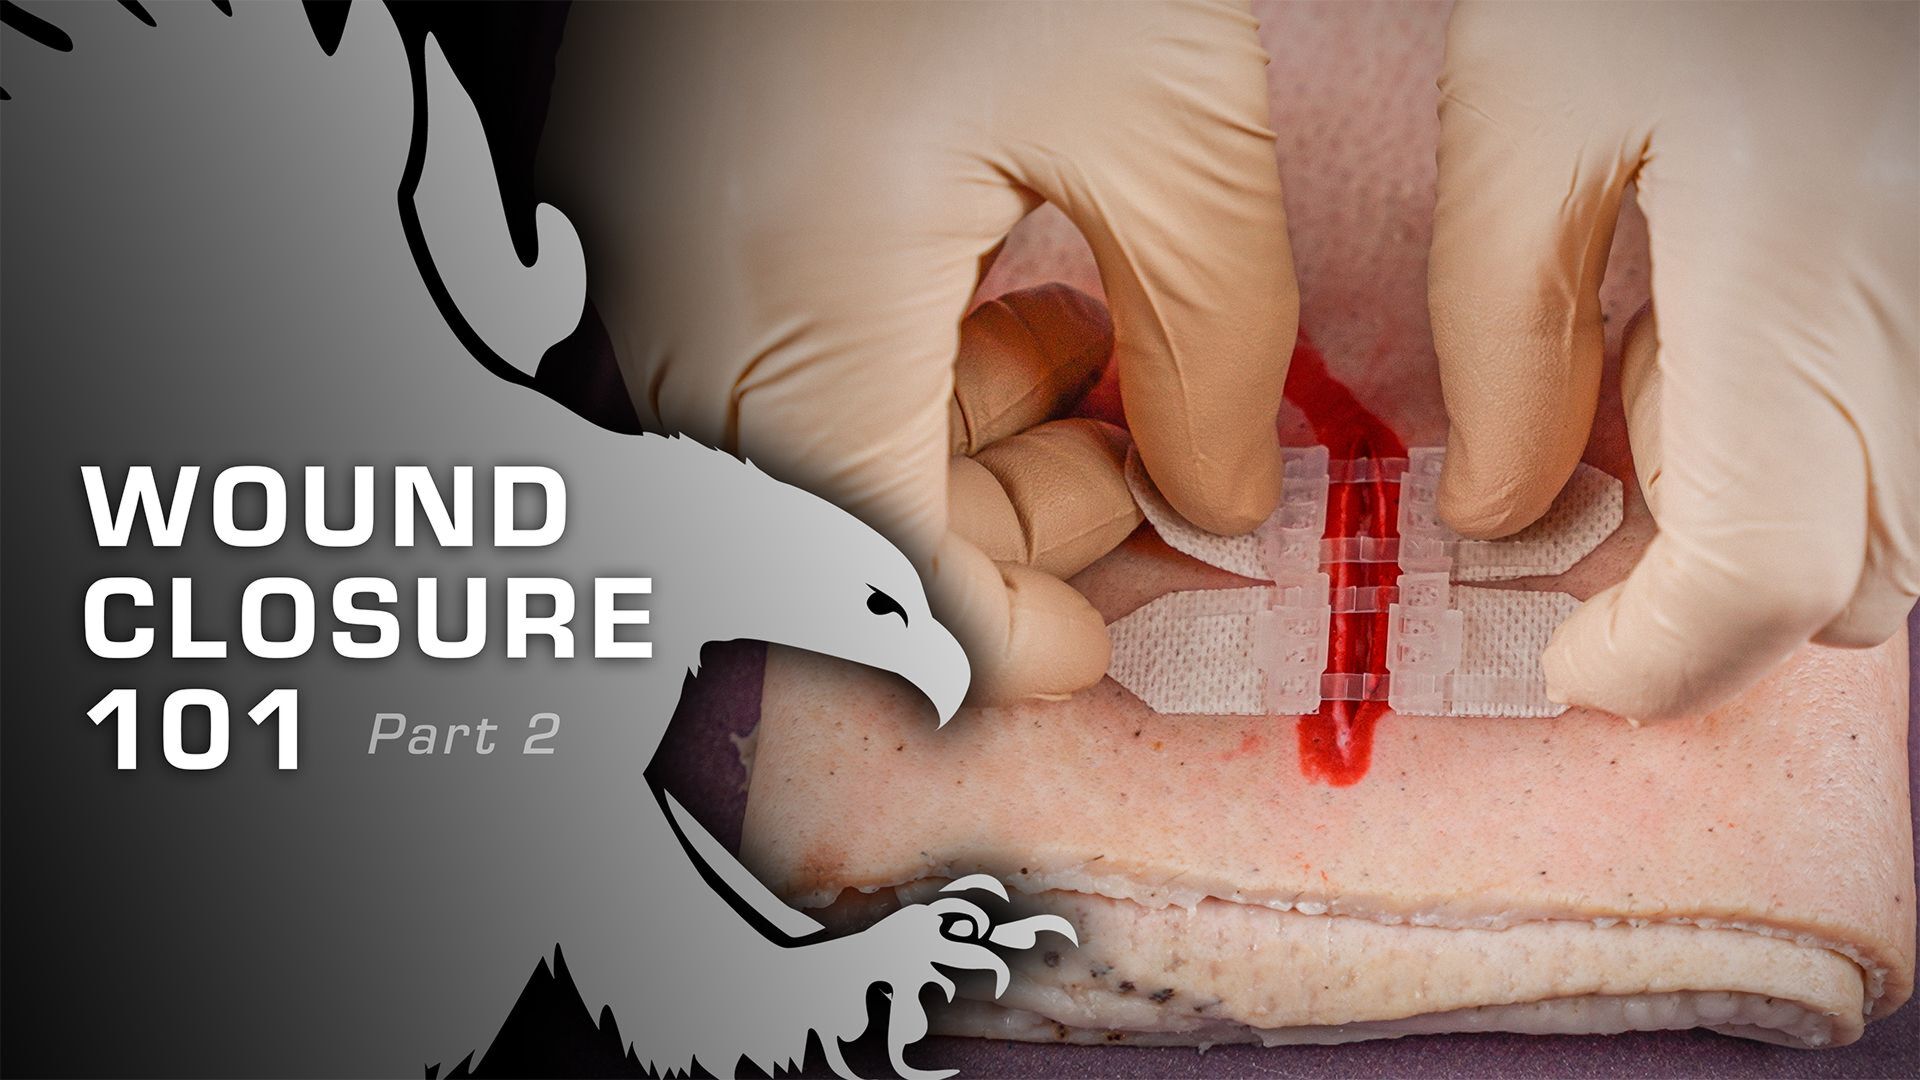
We're going to do is close this up using suture technique. So, suturing is a little bit more complex. It requires more skill. It requires, more tools, and it can be just a little bit more difficult to do, but it does make a nice cosmetic outcome. The suture that I'm going to show you here today is called a simple interrupted suture, but just know that there's a lot of different types of suture depending on the wound and depending on where it is in the body, and then how you want it to look cosmetically. Simple interrupted suture is the easiest one to perform. You can do multiple of these, and basically, you're just tying knots over and over.
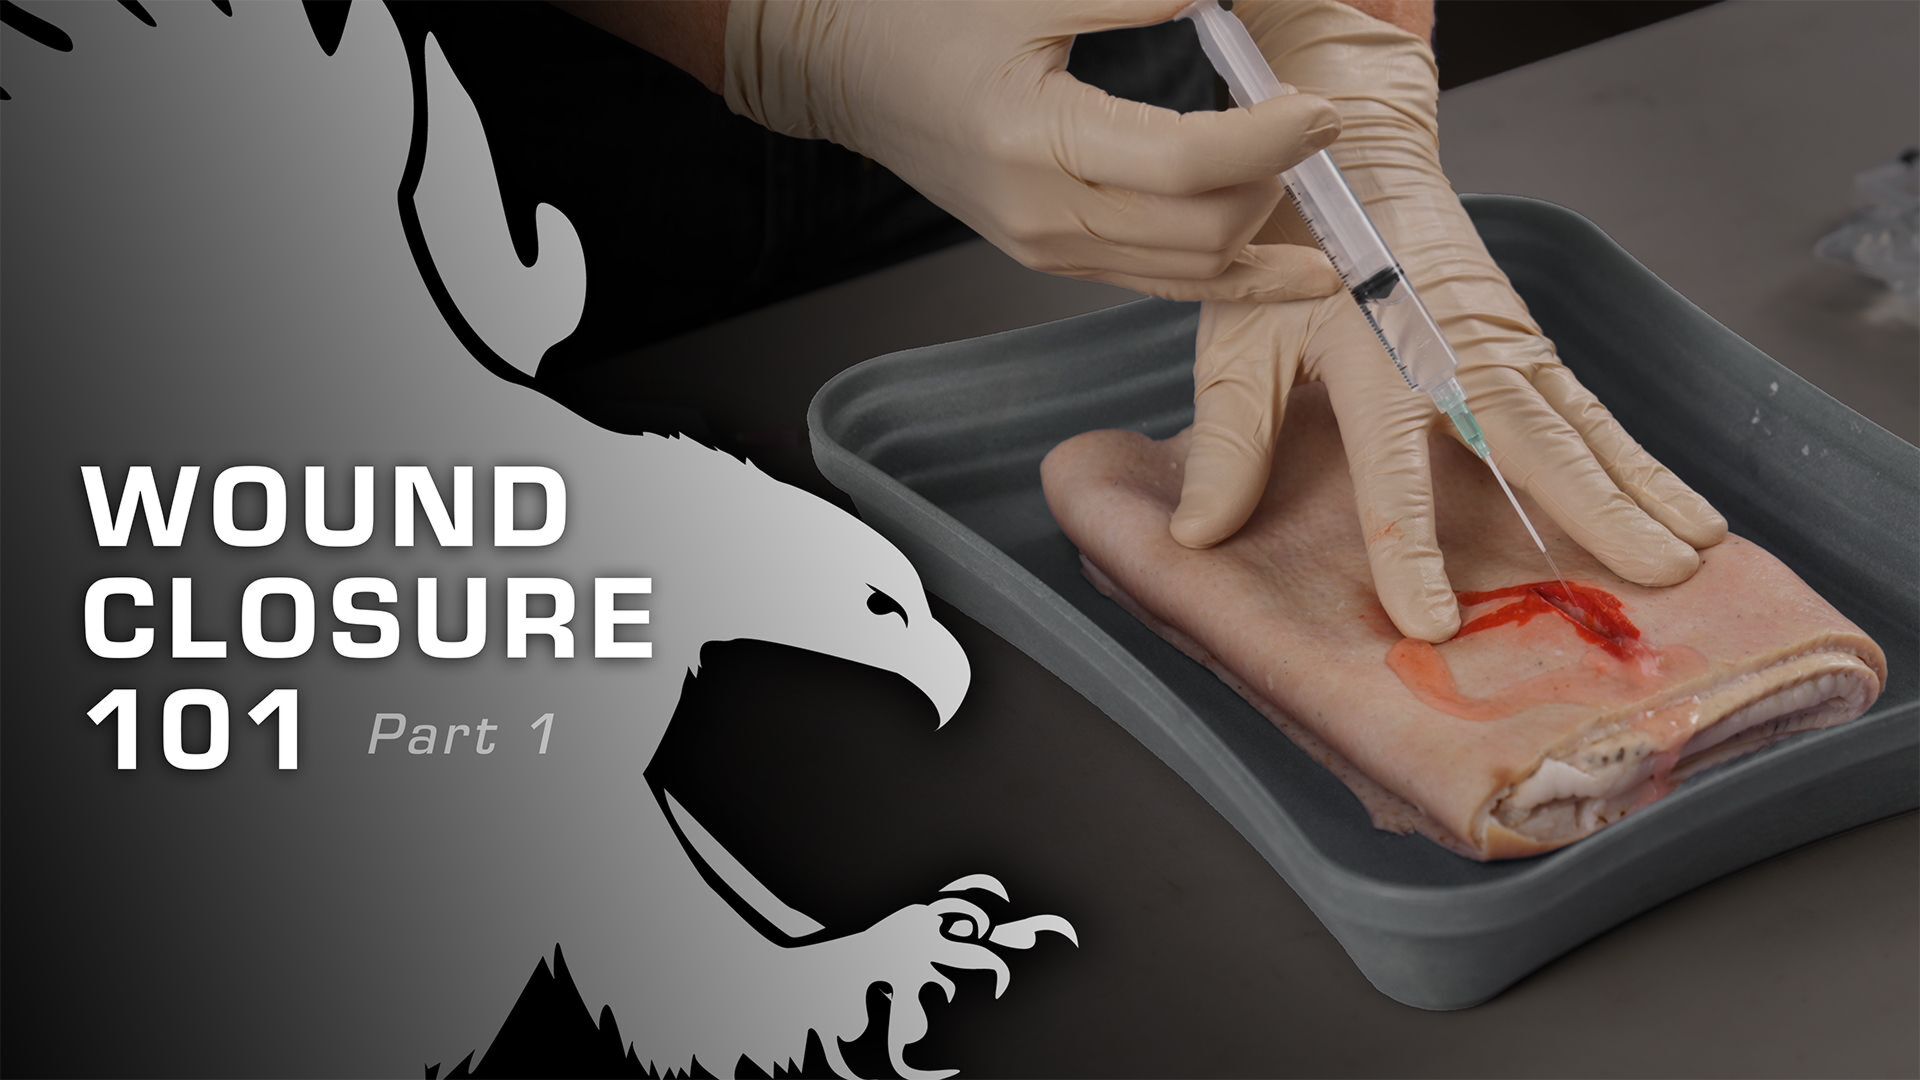
So, I've got my wound cleaned out. We've irrigated it. We've assessed it, I've got it dried out in a somewhat clean field. Again, this is not necessarily a sterile procedure, so you can use clean gloves and that's in some of the guidelines that we discussed below. But I do want to keep my field as clean as possible. And so, this suture kit has a nice little towel where we can take a look over.
I've got my wound all cleaned out and now I'm ready to get my needle drivers. I'm going to grab this about a third of the way down that needle. So, before I suture, what I want to do is make sure that all these edges line up really nicely, so what I like to do is just bring that together with my fingers until it looks good. Then I'll just make a mark on either side and that way I know as I suture when those come together, that's kind of my middle line, so I don't get any dog ears.
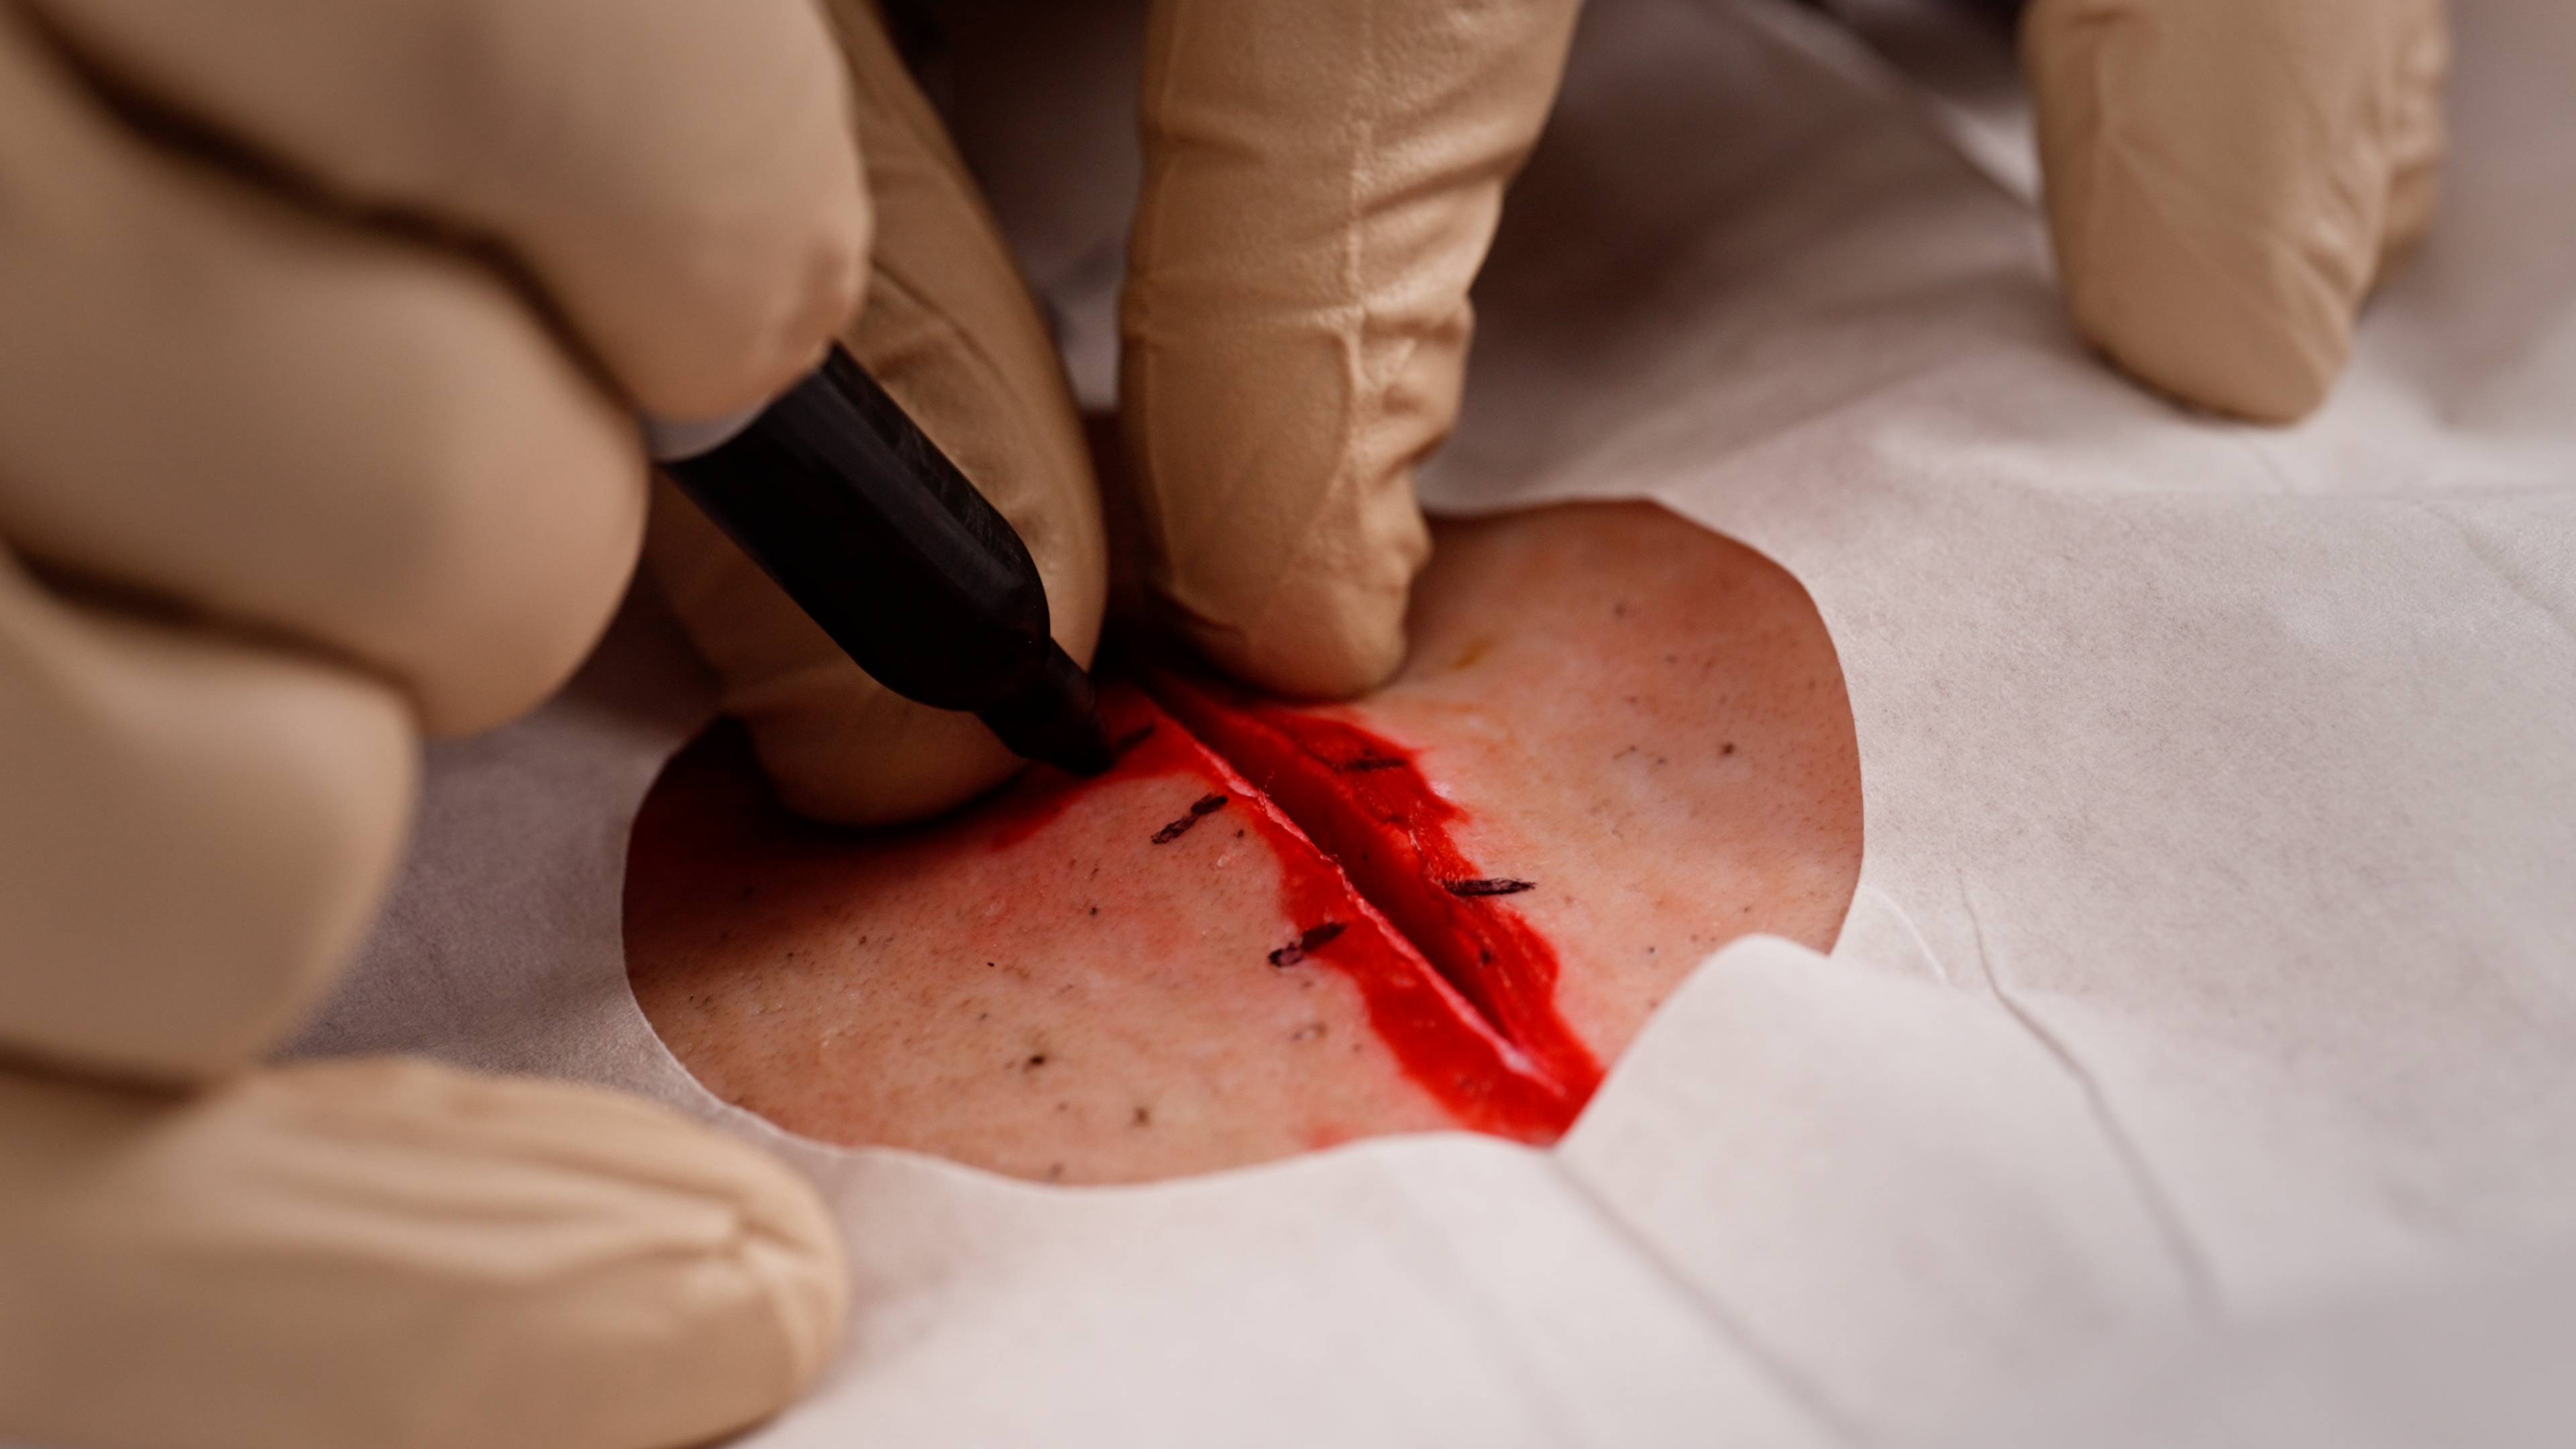
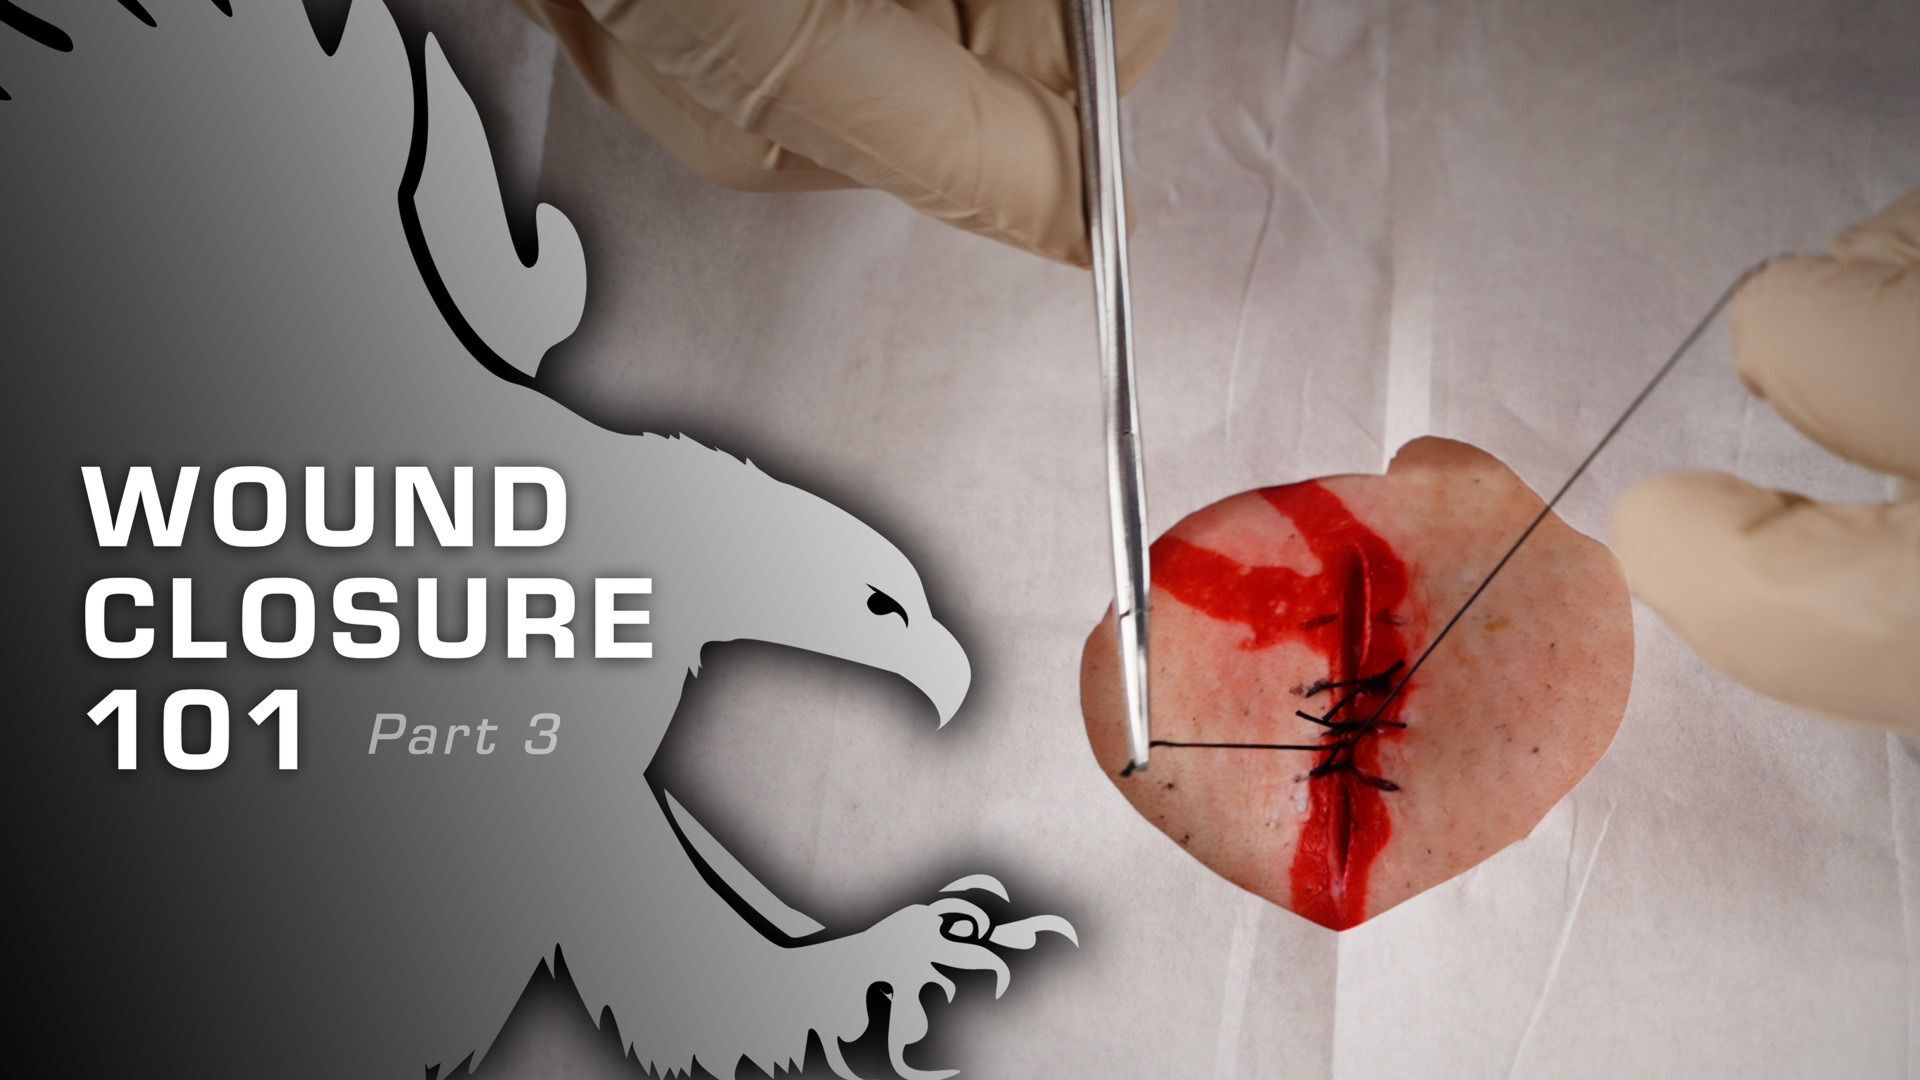
So, I'm using a silk suture today, which is less than ideal for skin, but it shows up well on camera, so we'll go ahead and do that. So what I want to do is grab the tissue. I'm going to start in the middle. I'm going to grab the tissue and I want to come down 90 degrees. The way that this is designed is you're going to turn and as you turn, it cuts.
So we're going to go straight down into the skin, and this is pig skin, so it's a little tougher. And then we're going to come out at another 90-degree angle. Then I use my line right here, and I'm going to come in and then come back through. I want to go ahead and hold this until I have just a little bit of tail left. I'm going to lay my needle driver right in the middle. I'm going to wrap one two times, grab the other end and pull across, and that knot's going to lay down nice and neat. Now, you don't want to strangle it, you don't want to go super firm on it. You just want to pull nice pressure until it approximates. I'm going to lay this back in the middle, and now this time I'm going to go around once. I'm going to bring it back through, and then I'm going to go a third time. Now I've got my suture right in the middle, and I want to leave just a little bit of a tail, so as I remove it, it's a little bit easier. So now I've got the first suture in, and then I'm just going to repeat.
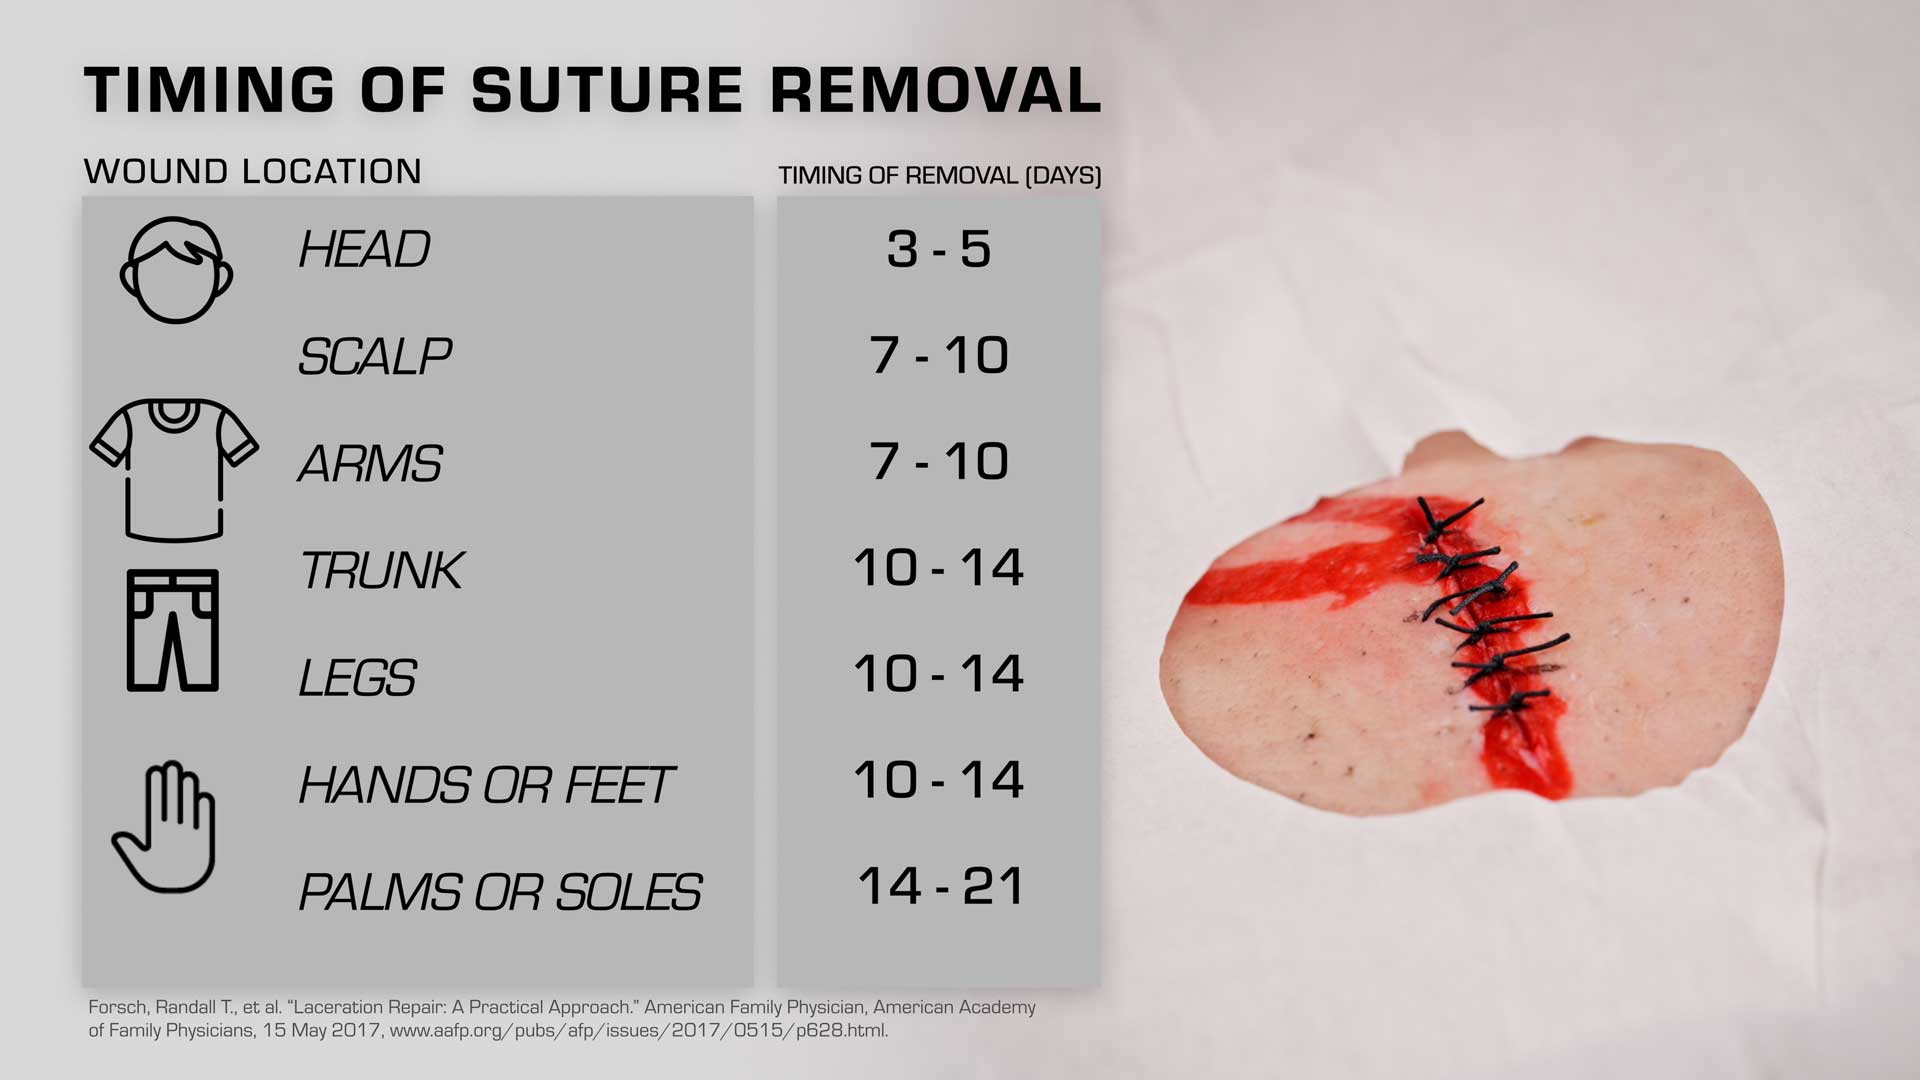
Timing of Suture Removal
So we'll post the times that you should keep sutures in and when to remove. It depends on which portion of the body. To remove it, all I'm going to do is I'm going to grab a firm, hold on the knot portion. Then on the other side, I'm going to slip my scissors underneath, cut and then pull out, and that suture's out and I just repeat as I go.
So that's how to evaluate a wound. A couple different ways to close it and a few tips. Hopefully that's helpful to you. Again, we've got the references below, so read through those yourself for more in-depth understanding on wound management.